


Intro
Contents
We’re back in the swing of things with networking. A short while ago we looked at a total of ten network plugs to determine how they install. We haven’t gotten around to a listening test yet, but that’s still to come if all goes well. Before we start that, however, we wondered: what if we made a really tight network cable ourselves? With an extra shield and a nice, extra insulating sleeve? How would that sound? Let’s find out.
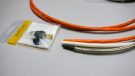
We had about 80 meters of network cable left over. And we had to do something with that. So we bought 4 pairs of Hirschmann plugs (those were the last four, so where did that stock go :-)) and four pairs of DeLock. The Helos plugs were also on back-order…. hmmm. Anyway: the DeLocks work very well too, so no need to worry.
Next, we bought ten meters of shielding for this test: braided. This version of tinned copper costs a little over 4 euros per meter. And to give it a nice finishing touch, we added a nice braid jacket: 2 Euros per meter. Our cable of 4 meters would then cost 7.5 euros per meter + 28 euros for the plugs. Rounded off 60 euros. With about 1.5 hours of work if you want to do it properly, it is not a bad investment…. if it sounds good, of course.
First steps
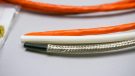
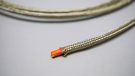
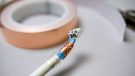
The first steps are fairly simple, though time-consuming. We cut the “raw network cable” and the shield to size. Next, we remove part of the rubber tube from the shield. This is in there so the shielding stays neat and can be installed easily. When we clear a bit in the shield, we work the network cable in. This is done by gently pushing the shield together so that the opening widens. Then you can slip an extra piece onto the network cable each time. As mentioned, it is time consuming. Think of it as meditating. To get the sleeve still on top, we tape the ends together for convenience. This tape can be removed later.
Sock it in
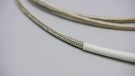
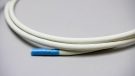
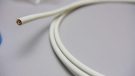
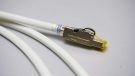
The sock – the sleeve – works in exactly the same way: just cut it to size and then by “pressing” the sock together, you make some room to fit over the cable. Take your time, because there’s really no point in rushing. We chose a neutral, white color. However, they come in all sorts of colors. Choose what you like.
Stripping and cutting
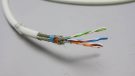

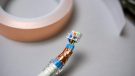
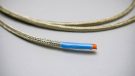
Now that basically the basics are done, we can start stripping the network cable – NOT THE CONDUCTORS- and putting the cable conductors on it. We do attach the insulation to both sides of this cable. This is because we also want to investigate differences between leaving one side open and both connected. So we are also going to make a cable with the shield connected on one side.
Do note though, that in fact the IEEE-standard states that the shielding should be connected on both sides. And by leaving one side disconnected you in fact can amplify RF noise by making an antenna.
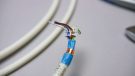
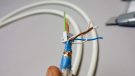
The nice thing about the DeLock plugs is that they already come with a copper foil adhesive. However, we also have our own roll. We use it to tape everything together more tightly, so that the plug can be attached more neatly. We also connect the shield of the cable itself with the extra shielding around the cable. That looks a bit tighter, although it is of course in the plug itself.
Adding plugs

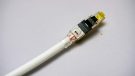

Once we have cut everything to size and taped the shielding to the copper foil, it is time to clamp the plug on. That’s a piece of cake with these plugs as we know by now. Once both plugs are in place, we check whether everything is in order with the cable checker. And of course everything is in order; we know this bulletproof system by now.